Wednesday, March 17, 2021

How to fully backup and restore your android device without root


How to fully backup your Android smartphone or tablet without root |

How to enable USB debugging |

  1. Go to your Settings menu
  2. Scroll down and tap on System
  3. Select About phone
  4. Tap on the device’s Build number multiple times until it enables Developer options. Newer devices will require you to enter your PIN/password/pattern
  5. Hit the back button and select Developer options within the System menu
  6. Make sure Developer options is toggled on. Scroll down and toggle USB debugging on


How to backup your Android device’s data |

  1. Plug your Android device into your computer
  2. Using either Command Prompt or Terminal, navigate to the folder in which the ADB tools are located and type in “ADB devices“. A pop-up on the Android device will appear if you need to grant your computer permission to interact with the phone or tablet. You will know if the command worked on your computer if it returns with the connected device’s identification number
  3. Type in “adb backup -apk -shared -all -f <filepath>/backup.ab“
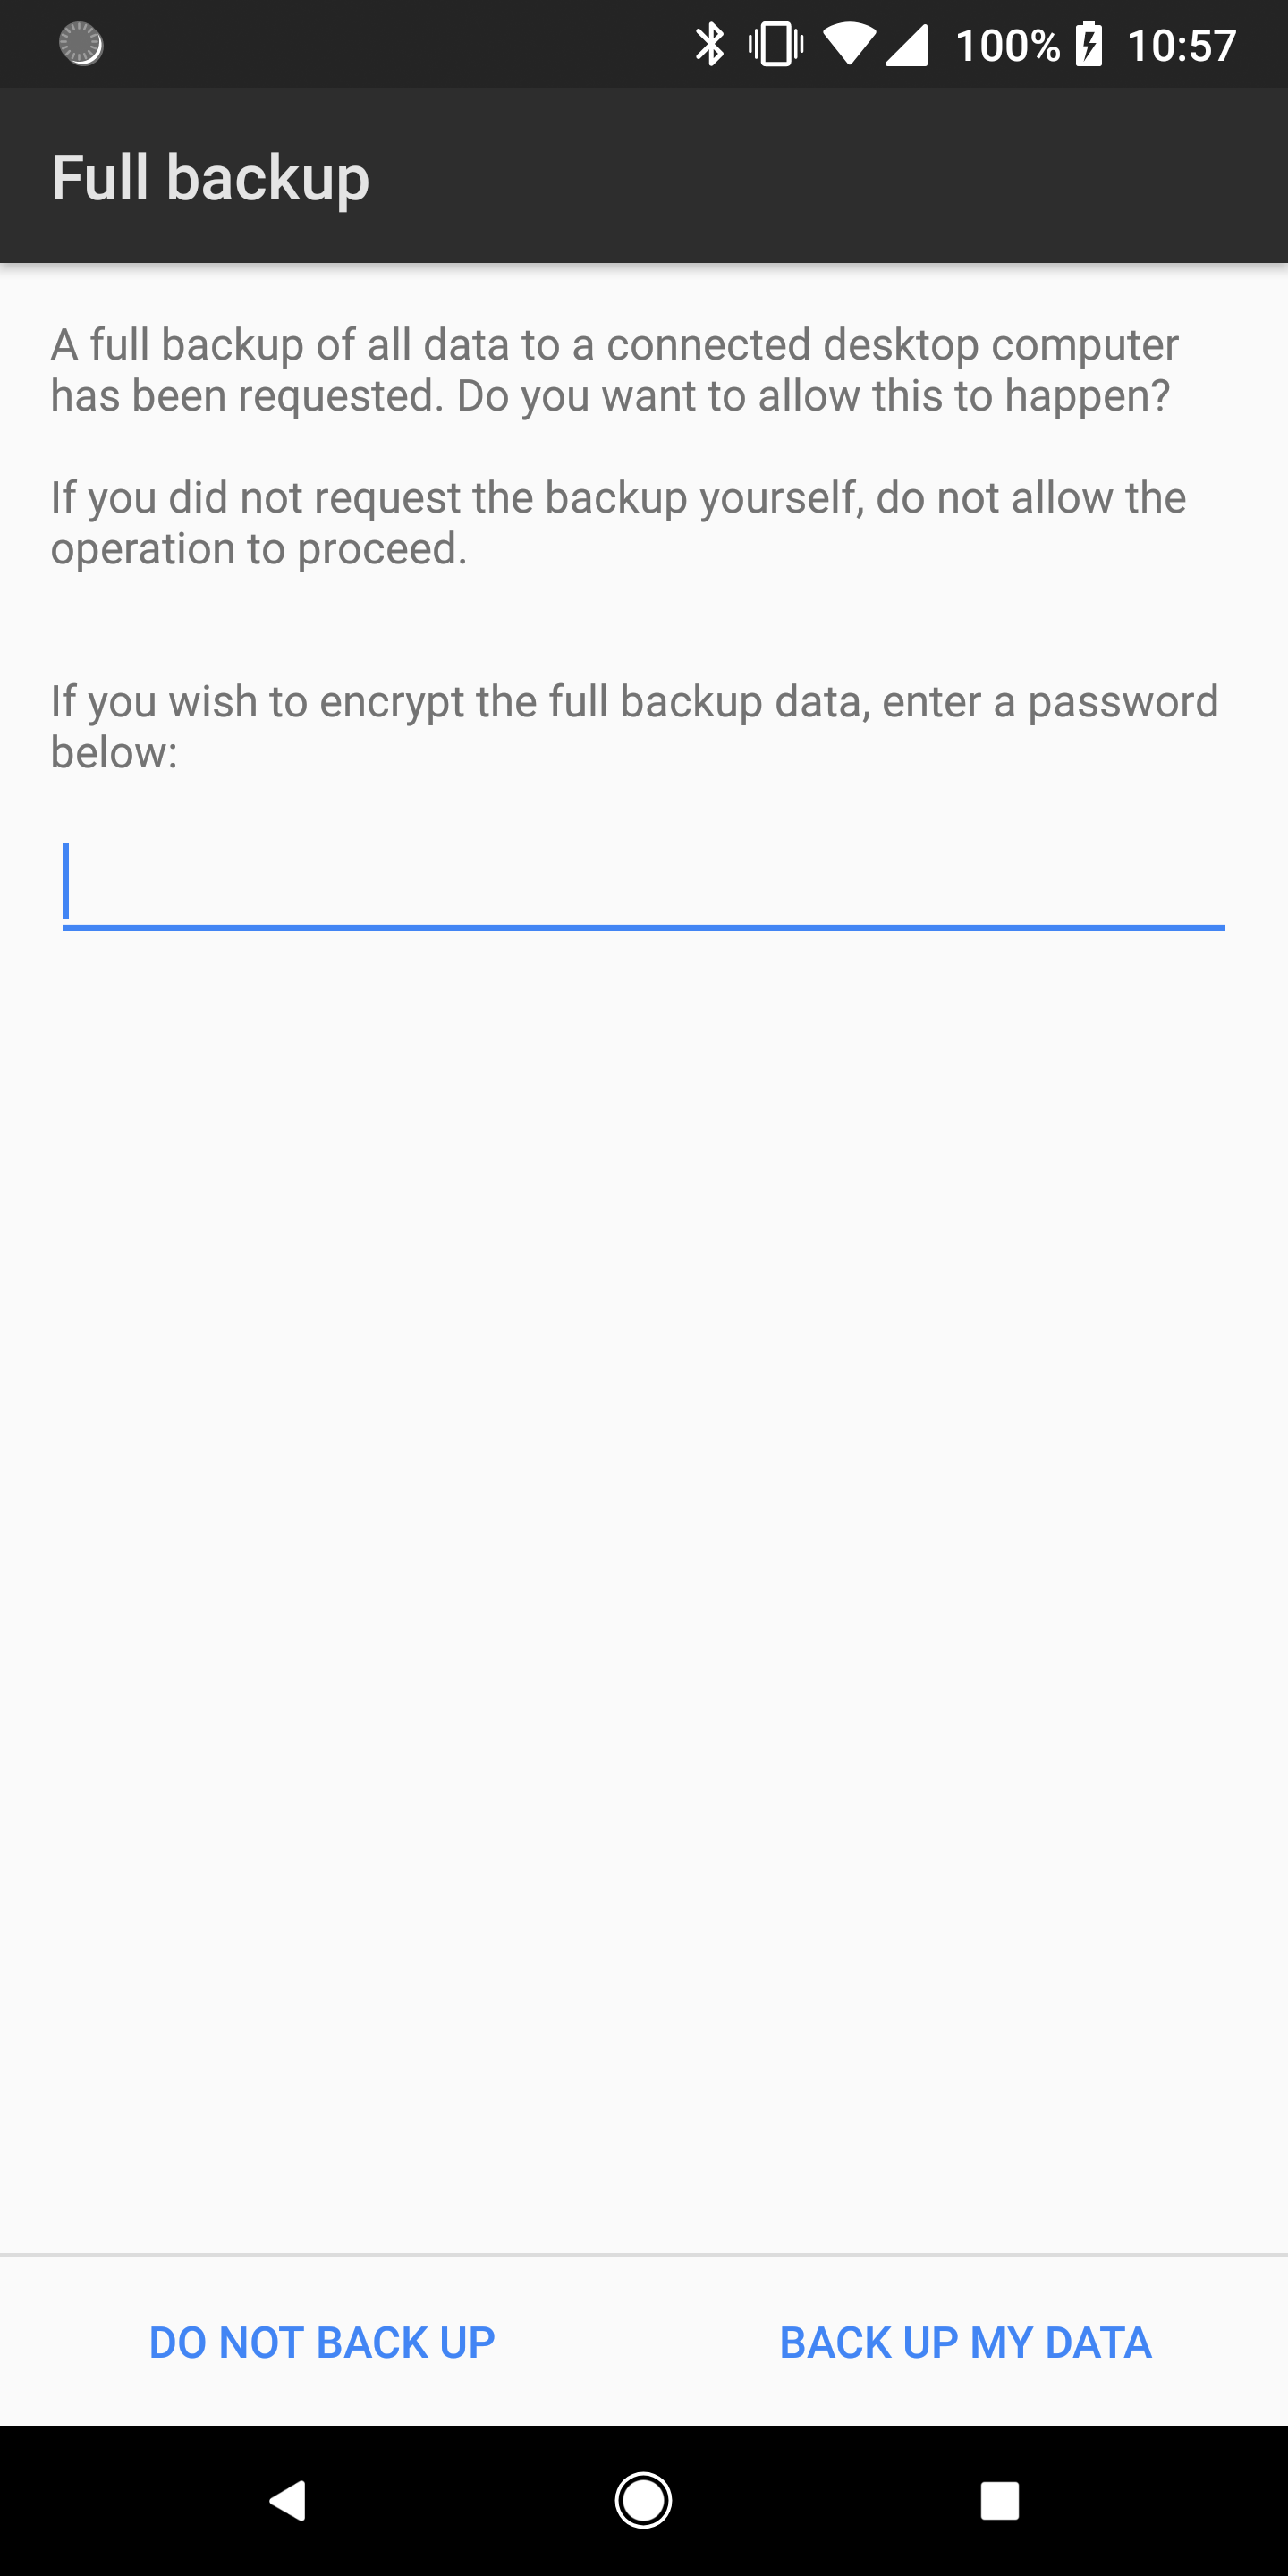
  4. Your Android device will now show the full backup window. Here you can encrypt your backup with a password (which is recommended)
  5. Tap on Back up my data
  6. This process can take several minutes and when completed, a new file will be placed on your computer

How to restore your Android device’s data |

  1. Plug your Android device into your computer
  2. Using either Command Prompt or Terminal, navigate to the folder in which the ADB tools are located and type in “ADB devices“. A pop-up on the Android device will appear if you need to grant your computer permission to interact with the phone or tablet. You will know if the command worked on your computer if it returns with the connected device’s identification number
  3. Type in “adb restore <filepath>/backup.ab“
  4. Your Android device will now show the full restore window. If you added a password to your backup file, enter it in the space given
  5. Tap on Restore my data
  6. This process can take several minutes and when completed, most if not all of your previously installed applications will be present on your device as well as photos and other data.

With respect: (c) Justin Duino

Sunday, January 10, 2021

Optocoupler RF protection module for RS232 CAT control for Kenwood TS480HX

 My new shack is more than a year installed on my new location near to old one.

I knew I had some RF noise coming from my PC but I did not pay too much attention till these days. It finally had it turn to be solved.

Main noise source is coming from my RS232 (DB9 female-female) CAT cable. This is simple straight DB9 serial cable that could be bought in every electronic shop.

Discussing with my collegue Z35O (Goran Trajanovski) how to eliminate this coming noise, usually at 7.140MHz, we made a conclusion:

1. To use torroide and to make couple of turns on serial cable

2. To use some new solution base on experience from users using it on Kenwood TS450S ( Interfacing Kenwood TS-450S to your soundcard ) 

Option 1 is rejected because ordering FT torroide and waiting for it in these days situation will took too long.

So , Goran Z35O suggested to try second option.

And we made it. Yet not tested but assembled and waiting for test period.

I would like to share this idea with other HAM operators (also aplicable for other radios) and post their experience with it. 

Used Pins: 2,3,5,7 and 8. Used material: 4xR470, 4 LED, 4x4N33 optocouplers.

Note: Pin 5, GND is closed loop separated for each side (it is not coming from PC to radio).

Many thanks for Goran Z35O for making this module.


Update 08.March.2021 : unfortunately this idea does not work. Looks like compared to ts450 that is using ttl levels of signals, ts480hx is using other signals type. 

Maybe this idea will inspire other amateur to try some other way and make proper working connection with galvanic-optocoupler protection.

73


Saturday, December 5, 2020

ATU-100 by N7DDC

Couple of days ago I receive my ATU-100. Interesting automatic tuner for a little of money. It has extended board in it (7*7) and a display. I tested it almost on all bands even on 160m and I can say it can handle my 8.2m long wire antenna with swrlower than 2:1. It works only in auto mode and I suppose it does not memorise settings for each band. But it tune fast ;) . It can handle up to 100w and I tested it with digi modes also work with about 35w output. According to seller it could possibly handle around 50-70w but I would not risk so much power at this moment, and as far as I know digi modes are designet to be used with low power :). Anyway, here is pics of it. Case is 3d printed and need additional finishing for good looking impressions.
I did not have much time to buy it in a kit, so that is why I bought it assembled.


Tuesday, May 12, 2020

Setting WSJTX and CQRLog

World pandemia make lot of people stay at home these months. It gives you time to do and done jobs that has been left for months before due to lack of time and willing to do them :)
Digimodes were on of them, left for better times mostly because of my dissapoint while working with Icom 706MKII.
Kenwood TS480HX is much more easier to set up to work with digi.
I made my digi cable using IU2MEH's guidance:  if you have old ps/2 keyboard there is chance to have enough wires in the cable to use it as a data cable for it. I tried with cable from ps/2 mouse but 3 out of 4 wires were correctly connected and the last one was connected to other pin. So, I use simple CAT5 cable, miniDin 6p and two 3.5mm stereo jacks. Do some tricky soldering of  miniDIN 6p and adter one destroyed miniDin jack, I made it :)
Here is link to manual: IU2MEH's SAT480 digi cable manual
I managed to set WSJTX and start work on digimodes.
I made lot of contacts and what I found litle bit tricky was importing every contact of WSJTX's adif log file to CQRLogm my program I use to work since I have HF radio.
So, I decide to find a solution how to make direct logging in to CQRLog. I know there is a option to use wsjtx but it is tricky to find it on the net. There is short instruction from OH1KH on Youtube so you can watch it there: WSJTX and CQRLog proper setting

In short: In WSJTX you have to choose HAMLIB rigctl given under radio option. Set Network Server to: Set LocalHost: xxxx , where xxxx is a port from a radio defined in CQRLOg radio settings.


Also in WSJTX in reporting tab you have to check boxes also where UDP is mentioned.

In CQRLog you just have to define WSJTX launch (in Ubuntu it is /usr/bin/wsjtx) path and check Run WSJTX efter entering.... option. This means that when you under File option choose remote mode for wsjtx, WSJTX will be automatically started. So take a note not to start WSJTX before entering remote mode from CQRLog. Also, please take a note that when you work like this, CQRLOg is in offline mode (that it should be) so do not worry.


When WSJTX started, minimize CQRLog and work normal with WSJTX. Every confirmed QSO in WSJTX is automatically logged in CQRLog also.
When you plan to end with your work, just close WSJTX and turn off enable remote mode for wsjtx in CQRLog under File option (previously choosen). Now you can continue your work with CQRLog and other modes with your radio.

That is it. Video guidance and above written is enough to start working digimodes.

73

Saturday, February 29, 2020

My new home and radio shack

Well it has been past 6 months since I moved to a new apartment. It is bigger than previous one so I have my own space for me :) . Unfortunately I  still at lower floors of the building (3rd fllor, around 13m above ground) and with a not so good options for my new antenna. Putting it on a roof require abot 30-40 meters of cable either Rg58 or Rg213, and a acceptance for mount of antenna, signed from 50% + 1 of neighbors living in my building. So I decide to temporarily put longwire (short, just 6.5m) from my balcony in orther to work. Got Kenwood Ts480HX as a base station and put my Icom 706mk2 in a suitcase for portable use. Helped by a friend, also a ham operator, that made for me noice cancelator, required for those ugly street led lights just below my window. Got used but good linear power supply 22amps and kept the old one, electronic-pulse, power supply for a backup. Have another two, one is halogen 30amps power supply and other is also linear but only 7amps, but due to limited space I am forces to keep them packed. 
For start it is not so much for a new shack. But it works :) and I started making qso's.  
Unfortunately lot of noise on 40m band due to some foreign radar interfere and also bad propagations, but it's satisfactory.
73
My new shack.
Good oldie but goldie Icom :)

Tuesday, April 23, 2019

XEOMA - webcam surveillance software review

Xeoma for me is not an unknown software. I've been using it 2 years ago. I decided to stop using it because there was not requirement for surveillance software that will record our activities and persons that come in and out in our company. Due to risen activities as a result of growth of our company, these days we faced requirement for software that will be active again as a surveillance for activities in our warehouse and office premises.
Browsing through my emails these days I noticed new email from Xeoma people, informing me about their latest software release. Knowing that this company can make surprise I decide to download their software, again :) .
Their latest release is Xeoma 19.4.22 and it gives fully functional image (one click run program file) of Xeoma software.
It run smoothly on my computer (Intel® Celeron(R) CPU G1620 @ 2.70GHz × 2 ) and it found my local installed IP cameras without any problem. What was surprising for me is that one of the camera's that require specific connection protocol, was accessed with ease and for a first time I saw image of my camera on other place beside my android phone :)
I am not such a great user and person that understand in cameras but I can say this software has good algorithm for processing of stream and images that result in very sharp and precise picture. Also tracking objects and sensors management is good and there are a lot of options and modules that can be manually be added in other to customize your camera monitoring procedure. What I like very much is face recognition and emotions modules where you can "train" your computer to recognize (by putting person(s) in front of camera for main setup of recognition) people you work with or some other unwanted persons and therefore to be able to inform you with email or other signalling procedure about it. Emotions module work similar except it detect emotions of the person and based upon it sending you report based on your settings.
Also, smoke detector is interesting for me as a simple solution where you can use this software for alarming when fire is present near camera view point.
ANPR sender to FTP is sensor in order to recognise plates of a vehicle and after that to send image to a programmed destination with a message-information about it. I did not tet it but i think it could be used in next period in order to make on-time information and recording of company car arrivals in order to track efficiency of  employees that work as merchandisers.
For first look, this software give lot of chances and options to keep you busy for a couple of days. It is easy programmable and easy to use and understand.
For me, the reason I return to this software after a while is a enough proof that simply it is best choice for surveillance software for personal and company uses.

Link to this software: Xeoma video surveillance software


Saturday, March 23, 2019

UNETBOOTIN's BLANK PROGRAM WINDOW

These days I suppose lot of Linux users face problem running Unetbootin blank program window.
Looks like some bug in a program and there is (I suppose) for now this solution:
Just make new shortcut in your Ubuntu or other Linux distribution (Applications-System tools-Preferences-Main menu for Ubuntu 18.04) with following command:

sudo QT_X11_NO_MITSHM=1 unetbootin

Also choose to run in terminal window so you can type your sudo password.

As far I can remember looks like it is somehow connected with latest kernel distribution of Ubuntu 18.04.2 LTS so there should be soon new update for this problem.

73 de Z34PEC